Monday, May 30, 2011

#29 Official DarkyROM - Gingerbread v2.3.3 (JVH) - Final v10.1 (Resurrection edition - lite)

The complete guide can be found on :

http://www.darkyrom.com/community/index.php?threads/guide-final-v10-1-official-darkyrom-gingerbread-jvh-noob-friendly.3080/


Short instructions how to install that:

- Remove sim and ext-sd card, perform also a format on the internal card just to have it cleaned.

- Get the below files from samfirmwares and install via odin (repartition checked).

15.779.890   CSC_XEE_JV3.tar.md5
415.744      Odin3v1.3.exe
174.031.809  PDA_I9000XWJVB - PHONE_I9000XXJVK - CSC_I9000XEEJV3.rar 

287.017.012  PDA_XWJVB_Sbl.tar.md5
12.585.010   PHONE_XXJVK.tar.md5
1.744        s1_odin_20100512.pit
              

- Get the Ficeto from Darky's page and install via odin (repartition checked).

348.241.920  Ficeto_Deodexed_JVH_I9000.tar
422.400      Odin3 v1.7.exe
1.744        s1_odin_20100512.pit


After the installation the well known lady will be heard, the lagfix is installed, let this run and then go back to recover mode and disable the lagfix, reboot let it uninstall and then you are ready to install either the extreme edition or the resurrection edition (lite version).

- Via odin install the below files (repartition checked).

348.252.160   Darky_Resurrection_10.1.tar
415.744       Odin3 v1.3.exe
1.744         s1_odin_20100512.pit

When this is done, go back to recover mode and re-enable the lagfix.

One last thing i did, but of course is optional, was to rename the /system/app/gmail.apk to gmail.apk.o (with root explorer), cause i do not use this app for emails, and then install Titanium Backup Pro to Freeze also google maps from starting as a service with each reboot.

Monday, December 20, 2010

#28 Custom Rom "Doc Rom : XXJPX (Unthemed) V6 / v6 Slim (19/12/2010)" - Maximum Transparency ! ! !

Simple steps to get the latest rom from Doc.

- Install stock rom xxjpx from samfirmware via odin
(csc and modem files i used those from xxjpu stock rom, with 512 pit and repartition enabled)

- Install CF-ROOT from xda forum

- Install the latest CWM

- Install the base or slim version of Doc, and then apply the theme you want on top of that.

Quadrant score of default voodoo lagfix - 1395


More info on http://forum.xda-developers.com/showthread.php?t=817703

merry xmas and happy new year 2 all...


Tuesday, November 16, 2010

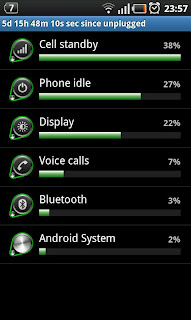
#26 Froyo v2.2 XXJPO v7.6.2 SreenShots !!


#25 Custom Rom by "Doc Froyo v2.2 XXJPO v7.6.2 (6/11/10)"

Simple steps you can follow and upgrade your phone to the latest stable JPO release.

1 - Get the stock ROM of I9000XWJM8 first on your piece with RE-Partition and 512.pit with ODIN v1.3.
http://www.samfirmware.com/WEBPROTECT-i9000.htm

Files used: 
CODE_I9000XWJM8.tar.md5
MODEM_I9000XXJM4.tar.md5
CSC_I9000OXXJM1.tar.md5
s1_odin_20100512.pit

2 - Get the stock ROM of I9000XXJPO first on your piece WITHOUT re-partition and 803.pit with ODIN v1.3.
http://www.samfirmware.com/WEBPROTECT-i9000.htm

Files used: 
JPO_JPO_U_JPP.tar
s1_odin_20100803.pit 

3 - Perform a factory settings restore, and after that setup phone language, location, disable automatic sync.

4 - Install CF-Root-XX_XEU_JPO-v1.2-Busybox-1.17.1.zip via ODIN. It's a much simpler root (to use) than the other methods available, just a single PDA flash through ODIN is all there is to it.
http://forum.xda-developers.com/showthread.php?t=788108

~~~~~~~~~~ extra comments start here ~~~~~~~~~~
MAKE SURE YOUR PHONE CAN ENTER DOWNLOAD MODE USING THE KEYCOMBINATION WHILE BOOTING BEFORE FLASHING CF-ROOT (or anything, really)

Features

- Root
- Superuser 2.3.6.1
- Busybox 1.17.1
- "2e" recovery (can flash unsigned update.zip's)
- Integrated fix for ClockworkMod's nandroid (2.5.0.4)

Instructions (long)
- Follow these instructions to the letter. 
  Do not touch any buttons or check boxes that are not listed below to touch!
- Unzip the attached CF-Root-JPx-vX.X.zip
- (USB) Disconnect your phone from your computer
- Start ODIN
- Click the PDA button, and select CF-Root-JPx-vX.X.tar
- Put your phone in download mode
- (USB) Connect the phone to your computer
- Make sure repartition is NOT checked
- Click the START button
- Wait for the phone to reboot 

- Done (if it took you more than 30 seconds, you need practice!)
~~~~~~~~~~ extra comments end here ~~~~~~~~~~

5 - Install latest Recovery Clockwork 2.5.1.2, remane it to undate.zip and run it via recovery mode.
http://koush.tandtgaming.com/recoveries/recovery-clockwork-2.5.1.2-galaxys.zip

6 - Install Doc Base ROM XXJPO V7.6.2
http://forum.xda-developers.com/showthread.php?t=817703 
XXJPO V7.6.2

7 - Get some extras and themes, I got the following files for my setup.
http://forum.xda-developers.com/showthread.php?t=817703


- Install Tayutama Theme template (Stock Android (AOSP) lockscreen, extended power menu, JPO)
AOSP and extended menu

- Install Theme (Doc standard theme, AOSP lockscreen + extended power menu, JPO)
http://forum.xda-developers.com/showthread.php?t=817703
Doc standard theme, JPO

- Install speedmod-kernel-i1_2-250hz-r2-CWM.zip Hardcore SpeedMod Froyo kernel
http://forum.xda-developers.com/showthread.php?t=822756 

~~~~~~~~~~ extra comments start here ~~~~~~~~~~
This kernel has:

- Based on JPM Froyo kernel and modules from XXJPO initramfs
- Works on all stock Froyo ROMs XXJPO/XWJPA and popular custom ROMs
- 341MB RAM and all features should work e.g. 720P recording & playback
- Includes sztupy's Universal Lagfix
- Includes neldar's BackLightNotification 2.2 from https://github.com/project-voodoo/ba...ernel_patches/
- Sharpness & color fix for UI, inspired by supercurio's work on Voodoo
- SpeedMod: Replaced kernel jhash2 with jhash3
- Includes my Startup Tweaks from http://forum.xda-developers.com/showthread.php?t=813309
- Adjusted kernel HZ value to (hopefully) balance battery life & smoothness
- Uses BFQ IO scheduler by default, from http://algo.ing.unimo.it/people/paol...ed/sources.php
- Updated ext4 code in kernel from http://www2.kernel.org/pub/linux/ker.../ext4-patches/
- Optimized compiler flags: -mcpu=cortex-a8 -mfpu=neon -mfloat-abi=hard -fno-gcse -fprefetch-loop-arrays --param l2-cache-size=512 --param l1-cache-size=64 --param simultaneous-prefetches=6 --param prefetch-latency=400 --param l1-cache-line-size=64

This kernel is based on sztupy's Universal Lagfix: Lagfix and root options are accessible by booting into the Recovery Menu. More instructions on other ULF settings are here: http://forum.xda-developers.com/showthread.php?t=814228

To get the best speed, it is recommended that you enable all Tweaks from the Recovery Menu. Tweaks are under ULK features. Info on Tweaks: http://forum.xda-developers.com/showthread.php?t=813309 
~~~~~~~~~~ extra comments end here ~~~~~~~~~~

In my case i use the below Lagfix mode and most of the Tweaks enabled.

No-RFS Overkill: turns on all options: everything is ext4+ext2 and /data/data is bound to /dbdata 
(If using the overkill scheme using the bind option is dangerous if using too much apps, so I disabled it in the advanced menu.) 

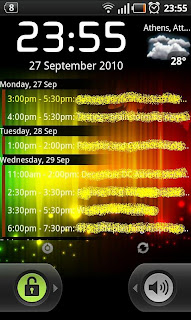
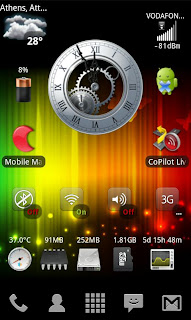
Screenshots will follow on the next post.   

Friday, October 8, 2010

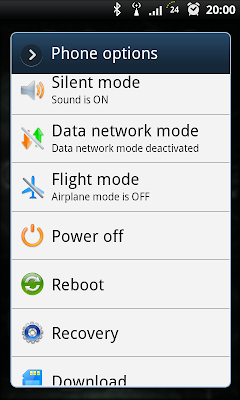
#24 Recovery & Download modes !


#23 Eclair v2.1 upgrade to I9000XWJM8 + Tayutama Lite mod v1.1

Official source and additional info and options can be found on the xda.
http://forum.xda-developers.com/showthread.php?t=774950

Some slightly different steps from what is described on the xda site, with some issues i came across.

Total execution needed to upgrade your phone and fully restore everything was 1 and 1/2 hours, of course you can do it faster depending on the number of apps you want to reinstall.

- Make any backups you want either settings or applications you might need. Contacts, sms, call logs ets.. there are many programs on the market.

- Install a clear M8 rom from
http://www.samfirmware.com/WEBPROTECT-i9000.htm
but be careful to get a proper CSC file, so that after the installation you get no errors during first reboot in CSC.

You can get the CSC from
http://ip208-100-42-21.static.xda-developers.com/showthread.php?t=770821
(in my case i use CSC_I9000OXXJM1.rar for Greece.)

- After the installation of default M8 make a factory reset

- Set phone language and time/location, i always remove the Automatic Sync of the accounts, inside the Sync menu in the settings. (remove the second link)

- Copy the Tayutama Lite or Normal file into /sdcard as undate.zip, go into recovery mode and select the update.zip to be applied. After that do not reset the phone, unless you you are willing to go through all the above steps again till this point.

- First thing I did then was to open KIES and sync with my outlook all the contacts.

(cause when I tried to sync my contact with SIM card and google account enabled, my contacts were copied to phone as Google contacts and not normal phone contacts)

- Then I inserted the SIM and SDcard, then entered my google account.

- Downloaded the OCLF v2.0 first, did the fix in all space of 1.500 MB. I did a test with quadrant before 913 and after 2269.
 
- Installed Appbrain and then let it sync the app list, had to press Perform installs and then all my apps were installed over the wifi within a few minutes.

And that's all.